I decided to do a DIY Cat Costume tutorial after not finding a good one online–most things labeled ‘diy’ suggested purchasing a tail and headband ears– which can cost as much as a full costume! I already had most of the items on hand– who hasn’t gotten a free sewing kit somewhere that includes a safety pin, scissors, black thread and a needle? Otherwise, the items are easily ‘borrowed’ from a neighbor–most people wouldn’t miss a needle and a few inches of thread and would happily donate them to the cause. The other items like felt are easily found in the craft section of your local megamart or craft store. Let’s face it, no one wants to spend $50 on an item your child will only wear once, and is likely poorly made to begin with, and running around will likely make it un-usable for a future child.
I wanted something SIMPLE that would be completely re-usable, and using a hoodie makes it both easy and 100% able to be re-used. This item is purposefully inexpensive, car seat friendly, and very easy and quick to complete. If you had all the materials, you could easily whip this up Halloween night and send the kiddo out the door, or put it together the afternoon before a work function or college party for adults. There’s nothing to obscure visibility, lose, rip off/remove or otherwise distract a young child–if they will keep a hood ‘up’ for 30 seconds at a time, then you are good to go. The tail is lightweight and not stiff, so it shouldn’t even be noticeable, but if so, it could be removed in the car between events.
I also wanted something that would easily be incorporated into a DIY SIBLING HALLOWEEN COSTUME, FAMILY HALLOWEEN COSTUME, or stand alone. Some ideas for groups are are: 3 little kittens (they lost their mittens), black cat and witch, cat and mouse, cat and dog, the cat and the fiddle, the owl and the pussycat go to sea, Cheshire cat and Alice, Puss in Boots and Shrek, Tom and Jerry, Sylvester and Tweety, Crookshanks and Hermione for the Harry Potter fan, or Garfield and Odie. Some of the more famous characters would require a bit more work, but the basics can be put together for very little time and cost.
Materials:
- Piece of black (or appropriate color) felt
- Piece of pink felt (or scraps)
- Black toddler hoodie sweatshirt (and additional clothing items to match)
- Stuffing for tail
- Needle and black (or appropriate color) thread
- Safety Pin
- Sharp scissors
Time: Approximately 1/2 hour
Cost: Sweatshirt plus about $1 in materials
Re-usability: 100%
Car Seat Friendliness: 10+
Difficulty: 1
If you can already sew (or can use the internet to find a ‘how to’) or use iron on fuse tape or craft glue, then you’ve got this down easy! I purchased a hoodie from Kohls (Original price $16.00, on sale for $8.00, I used a $5 reward and had a 15% off coupon for a total of $3.66). If you already have one or can beg/borrow/steal one from a friend then you’re all set. I used black, because my other child is Trick or Treating as a witch, and ‘black cat’ just goes with that, don’t you think? Total cost to me, less than $5.STEP 1: EARS
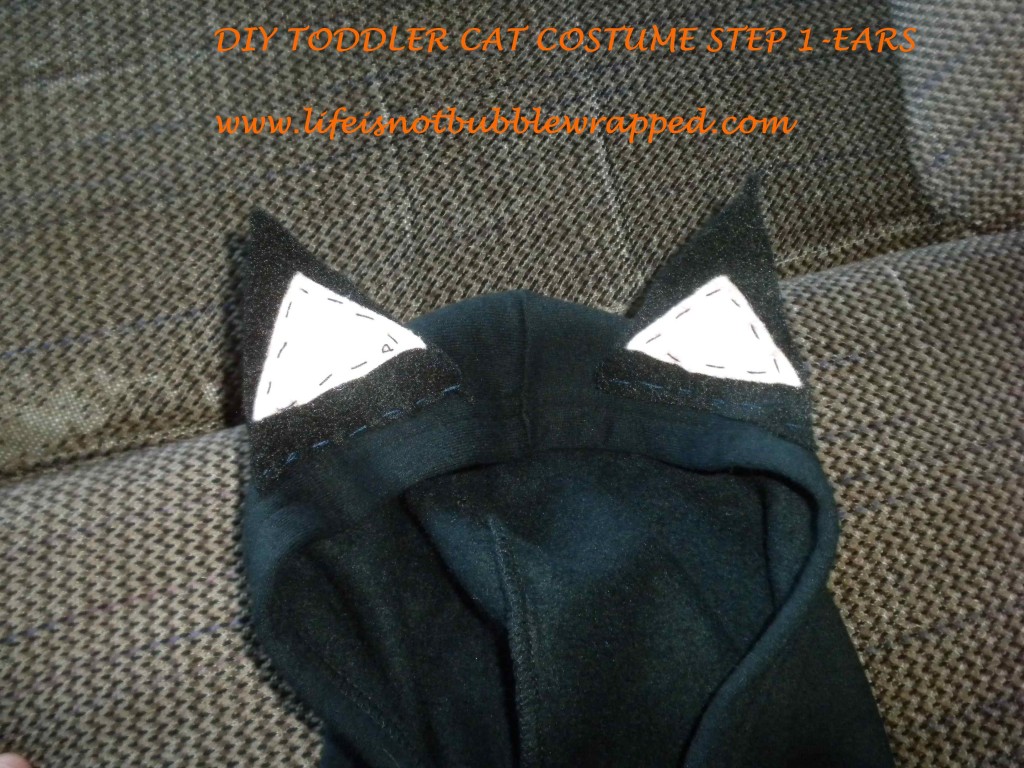
I gathered the materials and cut 2 small triangles out of one side of the piece of black felt. I cut 2 smaller triangles out of the pink felt. I ended up doing this with scraps. Each piece of felt is around 25 cents, you could save the pink felt for another project, sew ‘pads’ onto mitten palms, or use the extra pink felt to stuff the tail. Using the ‘animal’ colored thread, sew the pink triangle to the black triangle, repeat with the next triangle. If you wanted to make it look more professional, you could sew the pink triangles on with matching thread, and then use 2 triangles PER EAR and ‘hide’ the back of the ear containing pink thread with a back triangle piece sewn together with black thread, but that would take more time and materials, of course. If you’re using glue, just glue the pieces together, and if you’re using fusible tape, then follow the directions on the package. Next I placed the ears ‘pink up’ on the top of the hoodie and spaced them the way I wanted them. I found that there was a ‘ridge’ sewn around the front of the hood, so I just followed that line for ease of placement. Using the matching thread, I attached the ears to the hood. These are easily removed later if desired, making it fully re-usable as a sweatshirt jacket for the fall/winter/spring seasons-so size up!
STEP 2: TAIL
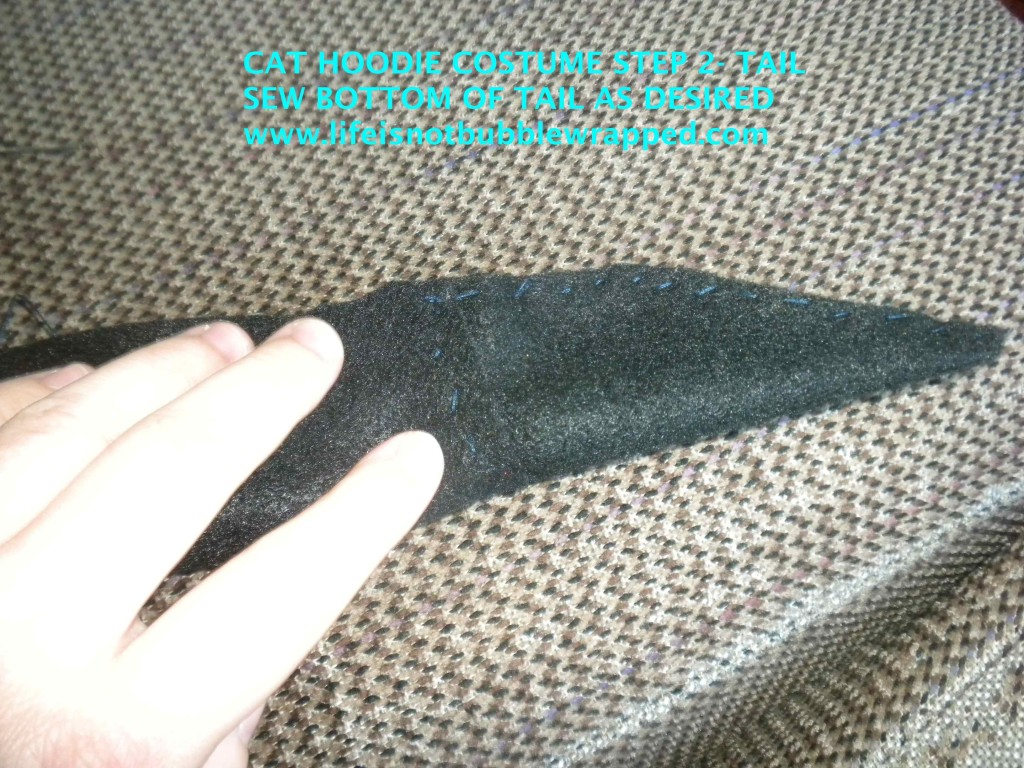
For the tail, I used the longest uncut portion of felt, and cut a strip, plus an additional triangle from the ‘mangled’ side for the ‘tip’ of the tail and then sewed the two pieces together to make a long ‘pointed’ rectangle. If you wanted a more rounded tail, you could cut a rounded end or leave the triangle off the end. You could also cheat and use a spare odd sock. I won’t tell. Starting at the ‘tip’ end, roll and sew the edges together, shaping a tubular ‘tail’.
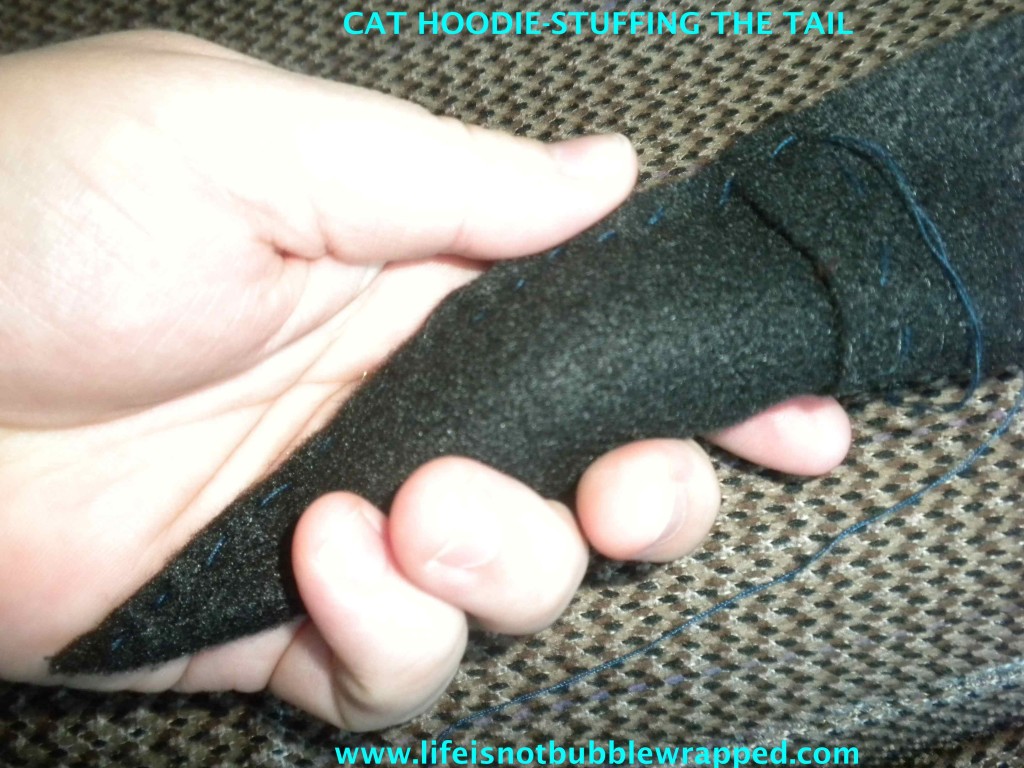
I sewed up a few inches and then used some cotton stuffing (like is in stuffed animals) leftover from another project to plump it up. If you wanted a flat tail, you could skip this portion, or use any other scrap material to ‘plump’ the tail. Even cotton balls, tissue or toilet paper would work.
Sew and stuff as you go, being careful not to push too hard and make stuffing ‘leak’ out of your seams. Once the tail is sewn and stuffed to the top, sew across the top of the tube to close it.
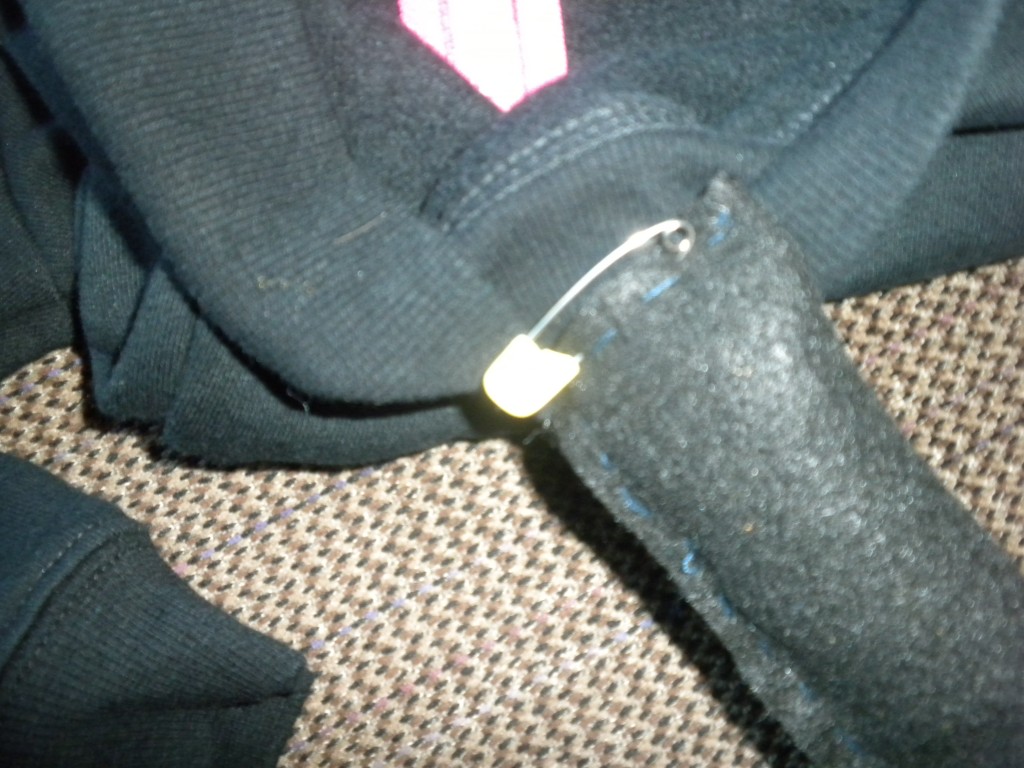
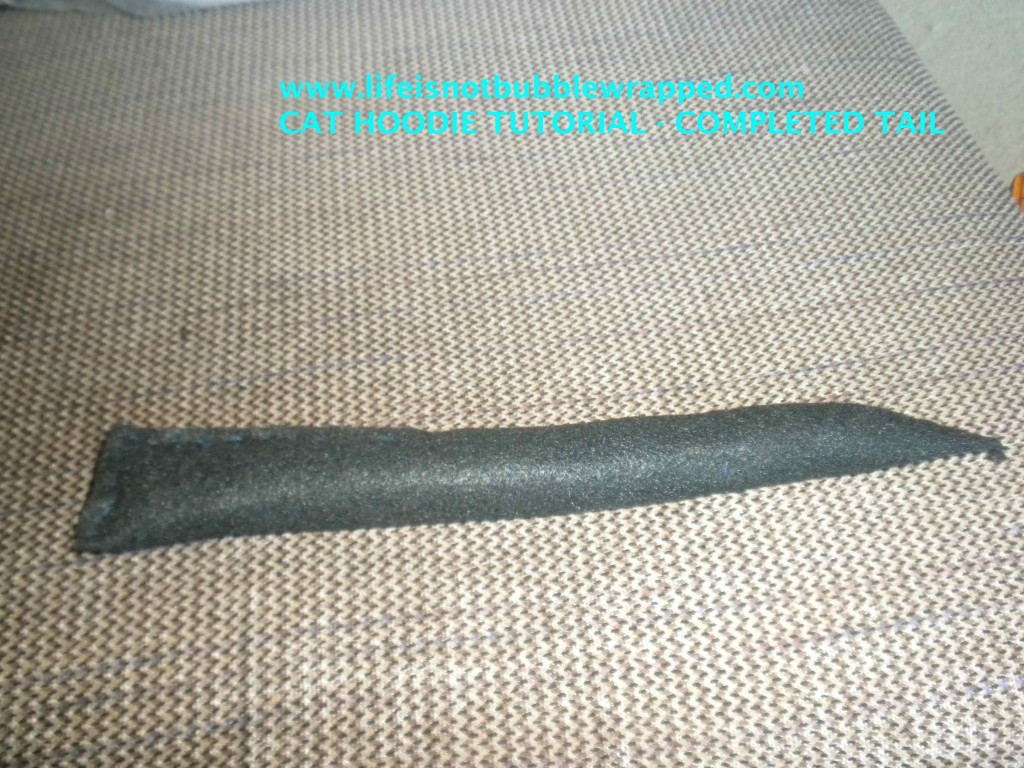 Use a safety pin to fasten the tail to the inside bottom hem of your hoodie. I like the tail to be easily removable in case it is bothersome to the toddler in the carseat. It only takes a few seconds to attach a safety pin, most kids can’t undo it by themselves, and it makes the hoodie truly ‘re-usable’ almost instantly.
STEP 3: DRESS UP!
Dress the child in the sweatshirt, similar color pants, socks, and shoes, and if you live in a cool climate, mittens. A little face make up to blacken (or pinken) the nose if desired and you’re all set!!

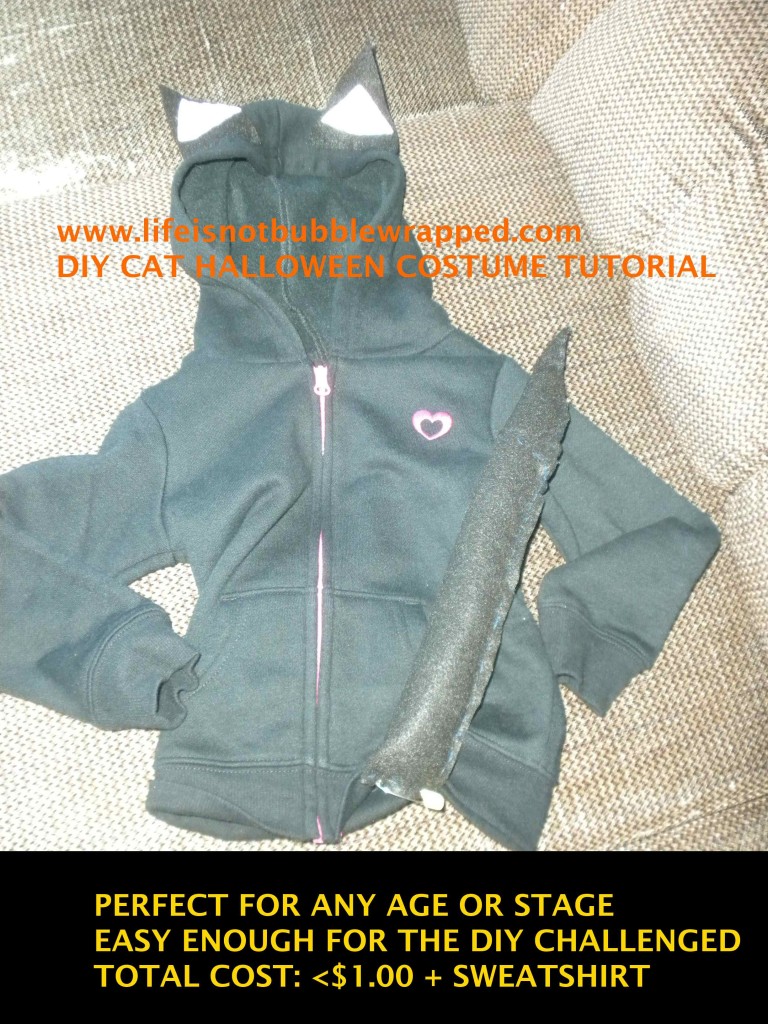
Now we just need a picture with our highly paid model 🙂